Hey there, creative powerhouse! Let’s have a real chat. You’ve poured your heart and soul into your craft—be it designing stunning visuals, writing compelling copy, or developing elegant code. Your work is brilliant. But if it’s living in a dusty folder on your desktop, is it truly working for you?
As a content strategist who’s been in the digital trenches for over five years, I’ve seen a single, powerful portfolio website transform a freelancer’s career from “just getting by” to “booked out for months.” The problem? The traditional path is paved with obstacles. You’re told you need to wrestle with WordPress, pay hefty monthly fees for website builders, or learn to code from scratch. It’s exhausting, expensive, and frankly, overkill for most creatives.
But what if I told you there’s a better way? A method that’s not only free but also leverages a tool you likely already use for its elegant simplicity: Notion.
In this detailed blueprint, we’re not just going to build a portfolio. We’re going to architect a powerful, client-attracting machine. I’ll walk you through every single step, from initial concept to SEO optimization, ensuring you leave with a professional website connected to your very own custom domain. Let’s build your future, one Notion block at a time.
Why Notion Isn’t Just a Tool, It’s Your Secret Weapon
We know Notion is great, but let’s break down why it’s the perfect foundation for a modern portfolio.
- Mind-Blowing Simplicity: Forget cPanel, FTP, and plugin updates. If you can type a document and drag a file, you possess all the technical skills needed. You’re building on a page, not in a complex backend. It’s a “what you see is what you get” experience that frees you to focus on what matters: your content.
- A Foundation of Clean Aesthetics: In a world of cluttered, flashy websites, minimalism stands out. Notion’s clean, typography-focused design provides a professional, gallery-like feel right out of the box. It respects your work by giving it room to breathe.
- The Ultimate All-in-One Command Center: This is the real game-changer. Your portfolio isn’t an isolated island. With Notion, you can have your public portfolio, your private project pipeline, your content calendar, and your client CRM all in one interconnected workspace. Imagine updating a project’s status internally and having that sync with your portfolio—that’s the power we’re talking about.
- Unbeatable Cost-Effectiveness: Let’s do the math on a “standard” website: Hosting ($10-$20/month), a premium theme ($60+ one-time), and a page builder subscription ($50+/year). That’s hundreds of dollars before you’ve even started. With our method, your only mandatory cost is buying a domain name (around $12/year). The rest is completely free.
Step 1: The Blueprint – Architecting Your Portfolio in Notion
A great building needs a solid blueprint. Let’s architect your portfolio for maximum impact.
Phase 1: Gather Your Assets
Before you lay a single block, get organized. Create a folder on your computer and gather:
- Your Best Work: Pick 3-6 of your proudest projects.
- High-Quality Visuals: Screenshots, mockups, videos, final designs.
- Project Details: The client, your role, the challenge, the solution, the results.
- Testimonials: Email screenshots or written praise from happy clients.
- A Professional Headshot: Good lighting, clean background.
Phase 2: Build Your Homepage (Your Digital Front Door)
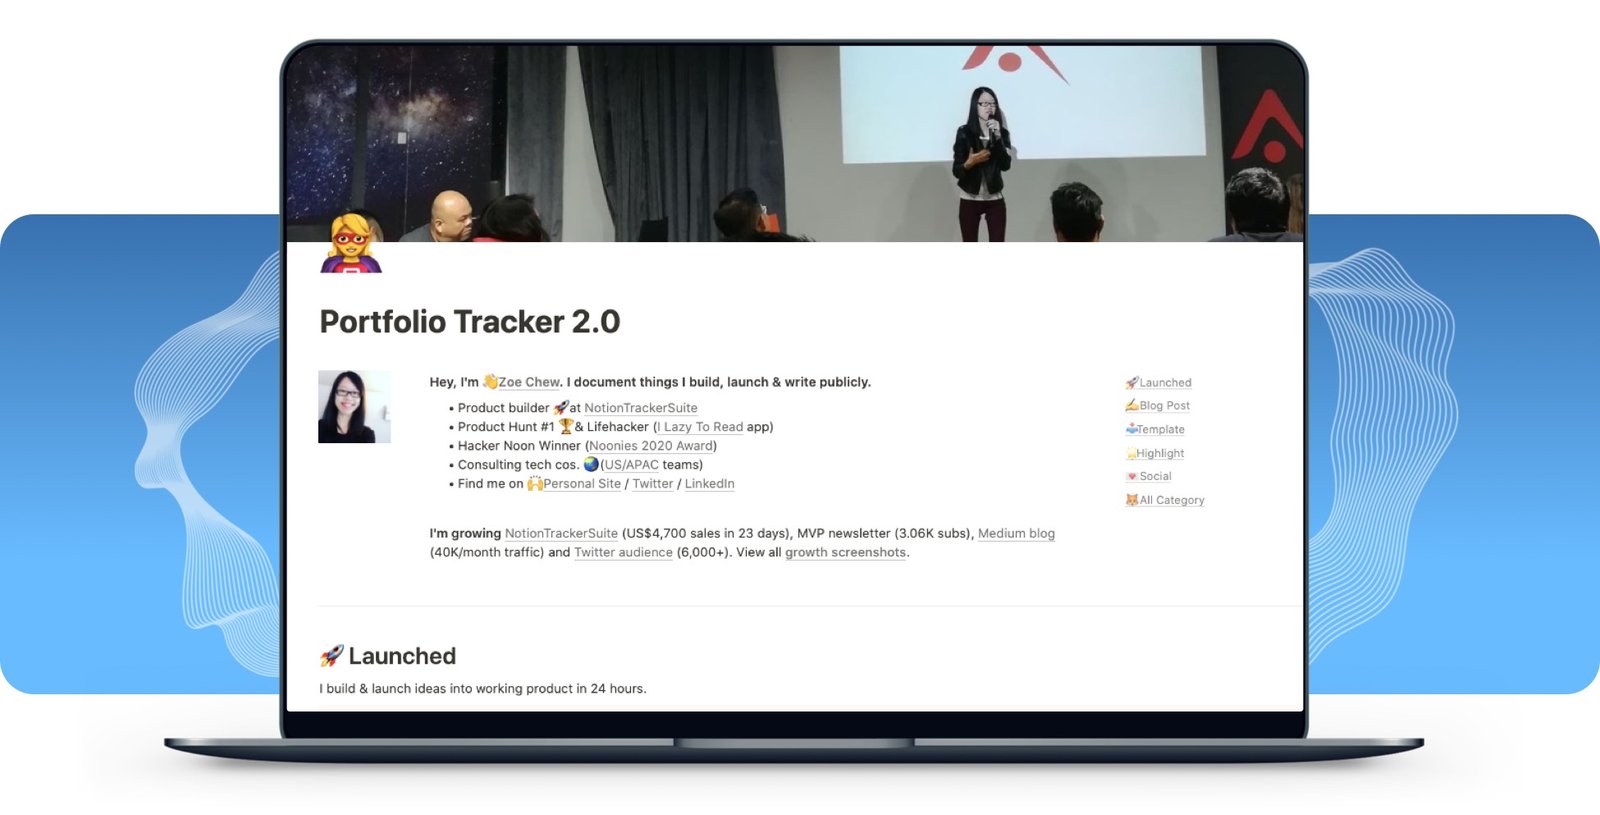
Create a new page in Notion. Title it [Your Name]'s Portfolio. Now, let’s build the structure.
- The Hero Section: At the very top, add a professional cover image. Then, on the page itself:
- Drag in your headshot and place it to the left.
- To the right of the image, type your name in H1 (Heading 1).
- Underneath your name, write your value proposition in H2 (Heading 2). Be specific!
- Good: “Freelance Writer”
- Great: “Freelance B2B SaaS Writer for Growth-Stage Startups”
- Below that, write a 2-3 sentence bio that’s warm and confident. Use a Callout block to make it stand out.
- Finally, add a clear Call to Action (CTA). You can even create a simple “button” by typing your CTA, bolding it, adding a link, and setting the background color. E.g., [View My Work ↓]
- The Services Section: Use H2 for a “My Services” or “How I Can Help” heading. Create three columns (
/columns) and in each, use a Callout block to detail a core service you offer (e.g., Web Design, Branding, SEO Content).
Phase 3: The Heart of Your Site – The Project Gallery
This is where you show, not just tell.
- Type
/database - inlineand create a new database. - Choose the Gallery layout. Set the
Card PreviewtoPage Coverfor a clean, visual look. - Set Up Your Properties: These are the metadata fields for each project. Click on a card, then
+ Add a property.Tags(Multi-select): For project categories (e.g., “UI/UX”, “Copywriting”, “Branding”). This allows clients to filter your work.Client(Text): The name of the client.Year(Number): The year you completed the project.Live URL(URL): A link to the live project, if available.
Phase 4: Crafting Irresistible Case Study Pages
Each card in your gallery should open up into a detailed case study page. This is what separates amateurs from professionals. Here’s a winning template for each project page:
- The Header: Use the project’s best visual as the page’s cover image.
- The Overview: Right at the top, create a two-column layout.
- Left Column: Briefly describe the project.
- Right Column: Use bullet points to list key info:
- Client: [Client Name]
- My Role: [e.g., Lead Designer, Content Strategist]
- Timeline: [e.g., 6 Weeks]
- The Challenge (H2): In a paragraph or two, clearly explain the problem the client was facing. What was the core pain point you were hired to solve?
- My Process & Solution (H2): Use Toggle Headings (
/toggle heading) for each stage of your process (e.g.,Discovery,Strategy,Design,Implementation). Inside each toggle, detail the steps you took. This shows your strategic thinking. Embed images, mockups, or even Loom videos (/video) to visually walk the client through your work. - The Results & Outcome (H2): This is crucial. How did your work impact the client’s business? Use bold text or Number blocks to highlight key metrics.
- “Led to a +50% increase in user engagement.”
- “Reduced page load time by 700ms.”
- Client Testimonial (H2): Use the Quote block (
/quote) to feature a glowing review from your client. It’s powerful social proof.
Build out your “About Me” and “Contact” pages using these same principles. For your contact page, embed a free form from Tally.so for a seamless, professional look.
Step 2: Going Live – From Notion Page to Custom Domain
Your portfolio is built. Now let’s give it a professional address.
1. Share Your Masterpiece
On your main portfolio page in Notion, click “Share” in the top-right corner, switch on the “Share to web” toggle, and copy the link. Your site is now live, albeit with a long Notion URL.
2. Choose Your “Wrapper” Tool: Super.so
Tools like Super.so, Potion, or Simple.ink act as a “wrapper” for your Notion page. They sit on top of it, allowing you to connect a custom domain and add pro features. We’ll use Super for its robust free tier.
- Go to Super.so and create a free account.
- Create a New Site and paste your public Notion URL when prompted. Super will instantly generate a live preview.
3. Connect Your Custom Domain (The Pro Move)
- Buy a Domain: If you haven’t already, purchase a domain from a registrar like Namecheap (my personal recommendation for its free privacy protection)
- Add it to Super: In your Super dashboard, go to the “Domains” tab and add your custom domain (e.g.,
www.yourname.com). - Get Your DNS Records: Super will give you two critical pieces of information: an
A Recordand aCNAME Record.
4. Demystifying DNS
This sounds scary, but it’s simple. Think of it this way:
- The
A Recordis the main address, pointing your domain to Super’s servers. - The
CNAME Recordis a forwarder, ensuring the “www” version of your site also works.
Log in to your Namecheap (or other registrar) account, find the “Advanced DNS” section for your domain, and simply copy and paste the values Super gave you. Delete any default records that might be there.
Human-to-Human Tip: DNS changes can take a few hours to propagate across the globe. Be patient. If it’s not working after 24 hours, the culprit is almost always a typo in the records or not deleting a conflicting old record.
Step 3: Getting Found – SEO for Your Notion Site
A beautiful portfolio is useless if no one sees it. Let’s tell Google what your site is about.
- Title & Description: In your Super dashboard, you can set a global Site Title and Description. This is what appears in Google search results and browser tabs. Make it count!
- Title:
[Your Name] | [Your Profession] Portfolio - Description: A 155-character summary of who you are and what you do, including keywords.
- Title:
- Use Headings Logically: Google loves structure. Because you’ve already used H1, H2, and H3 tags correctly in Notion, Super will convert these to proper HTML, which is fantastic for SEO.
- Target Long-Tail Keywords: Don’t just target “designer.” Target “freelance illustrator for children’s books.” Sprinkle these specific, long-tail keywords naturally throughout your bio, case studies, and service descriptions.
- Add a Favicon: In Super, you can upload a small image (a favicon) that appears in the browser tab. It’s a small detail that screams professionalism.
The Final Polish: You’re Ready for Launch!
You’ve done the hard work. Now, for the final 1%:
- Check Mobile Responsiveness: Open your new site on your phone. Does it look good? Notion and Super handle this well, but always double-check.
- Proofread Relentlessly: Use a tool like Grammarly or simply read your entire site out loud to catch typos.
- Get Feedback: Share the link with a trusted friend or mentor and ask them for their honest first impressions.
You’ve Built More Than a Website
Take a step back and look at what you’ve accomplished. You haven’t just created a portfolio. You’ve built a strategic asset for your business. A 24/7 salesperson that showcases your talent, proves your value, and invites your dream clients to connect with you. All with tools that are simple, elegant, and incredibly cost-effective.
Now, go update your LinkedIn profile, add the link to your email signature, and start sharing your work with the world. You’ve earned it.


